Secrets to a soundproof floor and using the right Acoustic Underlayment
Floor Soundproofing with Acoustic Underlayment: A Step-By-Step Guide
This comprehensive step-by-step guide will take you through the essentials of floor soundproofing using top-notch acoustic underlayment. We’ll break down each stage of the process, ensuring that you get the quiet and serene living space you deserve. Let’s dive in.
How It Works
Step 1: Assessing Noise Level for Targeted Floor Soundproofing
The first step involves assessing the level and type of noise to determine an appropriate floor sound proofing solution. This is essential to ensure the effectiveness of the overall soundproofing.
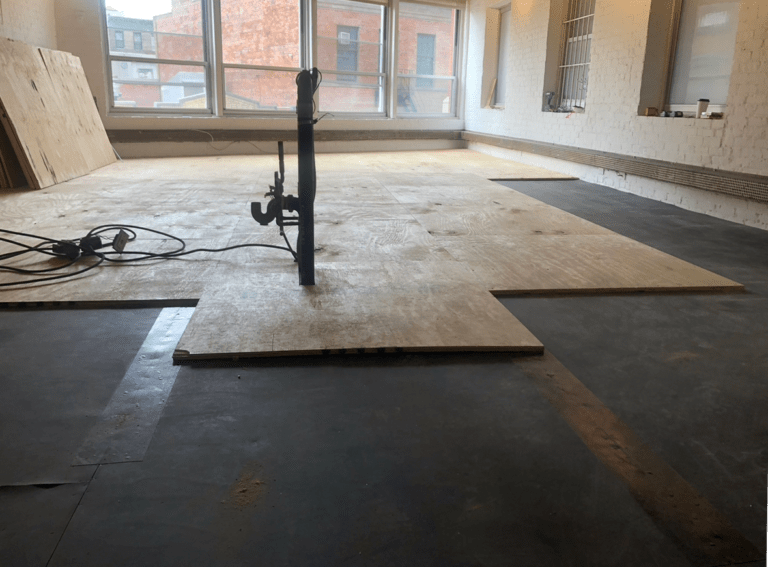
Step 2: Prep and Tear Up
Old flooring is removed and the base is prepared, laying the groundwork for the sound proof floor. In some cases, the floor is completely removed, while in others, we prepare and work over the existing floor, adapting to the specific requirements of the project.
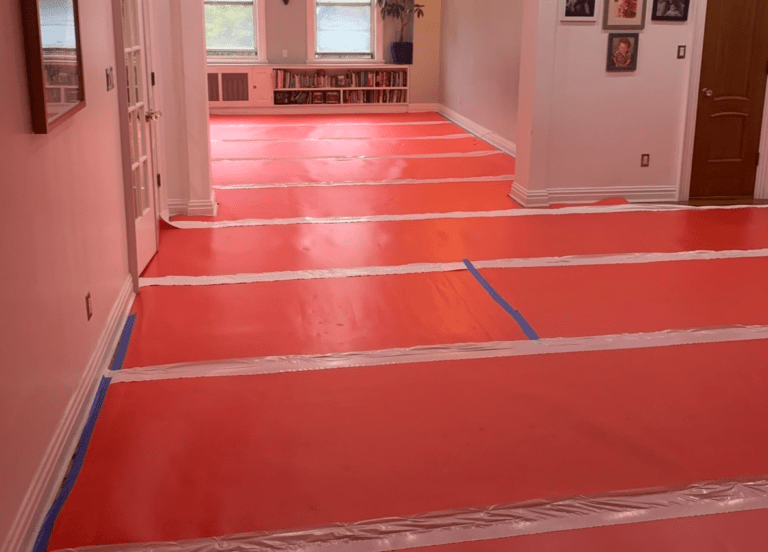
Step 3: The First Layer of Acoustic Underlayment
A layer of acoustic underlayment is applied, forming a crucial part of the floor soundproofing process, focusing on reducing sound transmission and vibration.
Step 4: Floor Soundproofing: The Second Layer of Subfloor
The addition of another subfloor layer is a key step, contributing significantly to the sound proof floor’s effectiveness.
Step 5: The Second Round of Acoustic Underlayment
Further layers of sound proofing materials are added to enhance the floor’s sound insulation capabilities.
Step 6: The Grand Finale: Installing Your New Floor
The new flooring is installed, with specific techniques employed as part of the floor sound proofing process.
Step 7: Floor Soundproofing Final Touch with Acoustical Caulk
The final step involves sealing with acoustical caulk and finishing to complete the soundproof floor, ensuring both functionality and aesthetics.
This approach to floor sound proofing focuses on achieving a balance between practical sound insulation and maintaining the visual appeal of the flooring, enhancing the overall living experience.
Why Choose Us
Trust Hush Soundproofing NYC to transform your space into a peaceful haven with our industry-leading soundproofing techniques
Expertise and Experience
With extensive experience in soundproofing, Hush Soundproofing provides highly specialized and knowledgeable services, ensuring top-quality results for residential and commercial projects.
Local Knowledge
Based in Brooklyn, Hush Soundproofing has a deep understanding of the local architecture and common soundproofing challenges, allowing for more effective and relevant solutions.
Customized Solutions
Hush Soundproofing offers tailored soundproofing solutions to meet the unique needs of each client, ensuring maximum effectiveness and satisfaction.
Exceptional Customer Service
Committed to providing an outstanding customer experience, Hush Soundproofing offers responsive, friendly, and professional service throughout the entire process.
High-Quality Materials:
Using only the best materials and latest technology, Hush Soundproofing guarantees durable and efficient soundproofing that stands the test of time.
Proven Track Record
Hush Soundproofing has a history of successful projects and satisfied clients, demonstrating reliability and consistent delivery of high-quality soundproofing services.
Why Hush Soundproofing
Our Clients
Client partners include residential, commercial, and institutional organizations that rely on precise soundproofing and acoustical execution.
IN-PERSON CONSULTATION
Contact Hush Soundproofing today! Our expert team is ready to assess your space and provide customized solutions to create a peaceful and quiet environment.